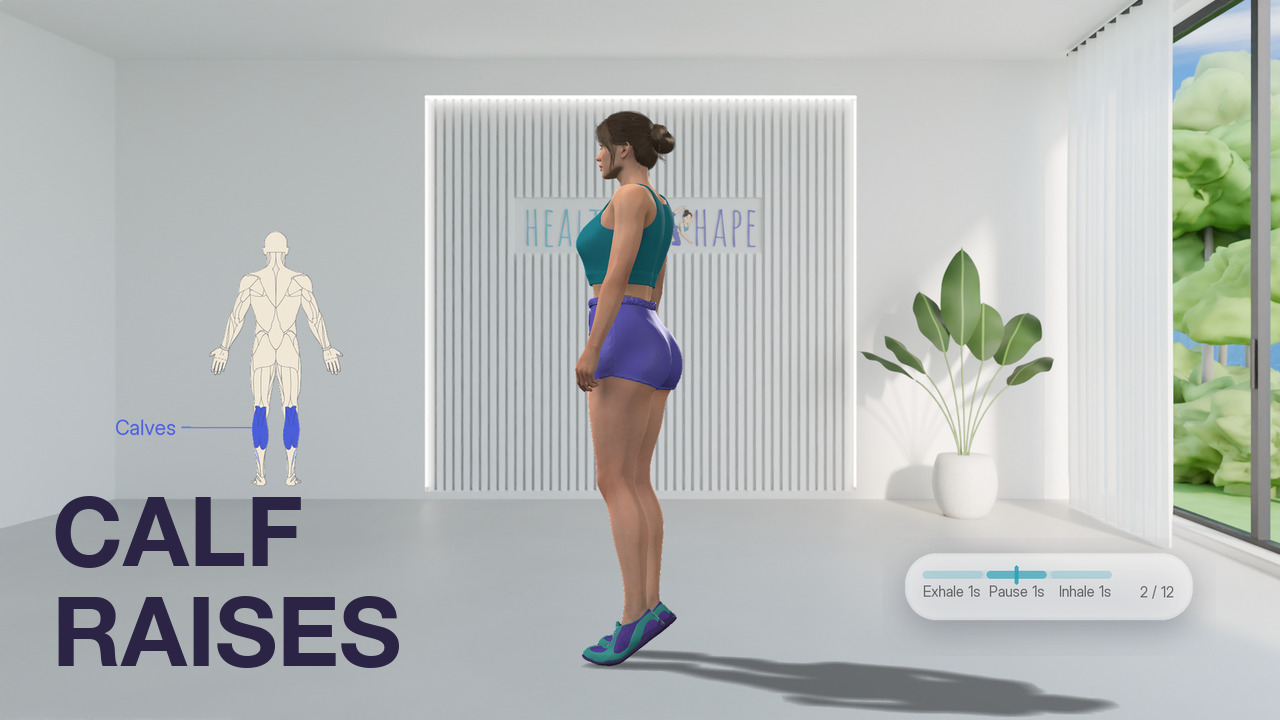
The calf raise builds strong calves with one simple movement: from standing, rise onto the balls of your feet, pause at the top and lower your heels with control. It needs no equipment, works two muscle groups when done with good form, and suits beginners, at home, in the gym or outdoors.
This guide accompanies our video lesson above. The video teaches the movement at the speed it is really performed, mostly from the side, where the rise onto the balls of the feet and the pause at the top are easy to see. Then it explains the muscles at work, the tempo and where the breath goes, and names the four most common mistakes, each with the cue that fixes it. Last come twelve repetitions at full speed, from all four camera angles, for you to follow along with.
How to do a calf raise, step by step
- Set up. Stand tall with your feet hip-width apart and your toes pointing forward. Let your arms hang relaxed at your sides, keep your shoulders loose and engage your core. If needed, stand near a wall for balance.
- Rise onto the balls of your feet. Lift your heels and rise onto the balls of your feet in about one second, with your weight spread evenly across them.
- Squeeze and pause at the top. Squeeze your calves at the highest point and pause there for one second.
- Lower with control. Bring your heels back down to the floor in about one second, without letting them drop.
- Keep your knees straight. Your knees stay straight but not locked throughout, and your posture stays tall.
- Repeat. Both feet work together, so every repetition is the same: up, pause, down, without bouncing.
Muscles worked in a calf raise
The calf raise is an isolation movement at the ankle, and two muscle groups share the work: the calves lead as its target muscles, and the muscles of the shins and ankles assist them.
- Calves: the gastrocnemius and the soleus, at the back of the lower leg, lift your heels off the floor.
- Shins and ankles: two smaller muscles of the lower leg, the peroneus longus and the tibialis posterior, keep your ankles steady so they don’t roll in or out.
Tempo and breathing: 1 up, 1 pause, 1 down
Every repetition follows the same rhythm and takes about three seconds:
- Up, 1 second: breathe out as you rise onto the balls of your feet.
- Pause, 1 second: at the top, with your calves squeezed.
- Down, 1 second: breathe in as you lower your heels with control.
That rhythm is what turns movement into training: the pause at the top and the controlled way down keep your calves working instead of letting a bounce do the job. Keep the same tempo on every repetition, and don’t speed up as you tire.
4 common calf raise mistakes and how to fix them
- Rushing the rep. If you rush, slow it down: one second up, a one-second pause, one second down. Cue: “slow it down”.
- Stopping halfway. If you stop halfway, rise all the way up onto the balls of your feet. Cue: “all the way up”.
- Ankles rolling. If your ankles roll in or out, keep your weight even across the balls of your feet. Cue: “weight even”.
- Heels dropping fast. If your heels drop fast, lower them with control. Cue: “lower with control”.
Sets, reps and variations
For general fitness, 2 to 4 sets of 10 to 20 repetitions are typical, with 30 to 45 seconds of rest between sets. Adjust the volume and the rest to your training goal and your experience. A good first set is the one in the video: twelve repetitions at one second per phase.
- Easier: keep one hand on a wall or a chair for support, don’t rise as high, or do your calf raises seated.
- Harder: work one leg at a time, add weight with dumbbells or a barbell, or stand with the balls of your feet on a step so your heels can lower further.
Safety
Don’t bounce or use momentum, and keep your knees straight but not locked. If you have Achilles tendon problems or plantar fasciitis, consult a professional before doing calf raises, and use a wall or a chair for balance if you need it.
Your turn
Play the video above and do twelve repetitions with the coach, at the speed you would really train, rising all the way up on the last repetition just as on the first. If this lesson helped, subscribe to HealthyShape on YouTube for a new exercise lesson every week. Every exercise in the HealthyShape app carries the same muscle view and tempo guide you see in the video.